Make Your Own DIY Toolkit
One of the most common questions asked by beginning do-it-yourselfers and first-time homeowners is, “What tools do I need to get started?” In this video we’ll help you assemble the right tools that you’ll need to tackle a wide range of home improvement projects.
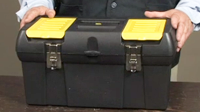
Find a toolbox that will withstand use. Many come with extra compartments on the lid. Pick the one right for you.

Pliers: slip-joint, needle-nose, and a medium-size channel-locking pliers.

Screwdrivers: one slotted and one Phillips.

A medium-sized adjustable wrench.

10-inch bullet level. Place in a safe spot in your toolbox so that it doesn’t get damaged.

A retractable blade knife, commonly known as a box cutter.
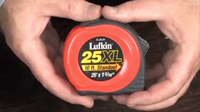
25-foot tape measure.

A hammer is a common staple in any toolkit.
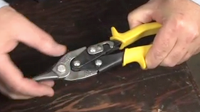
Metal wire snips if you plan to cut sheet metal.

Look for combo tools that perform more than one task. This chisel is also a file.

Putty knife.

Hacksaw and keyhole saw.

Safety gear such as gloves and glasses.
Read Video Transcript
One of the most common questions we get from beginning do-it-yourselfers and first-time homeowners is, “What tools do I need to get started?… While this certainly depends on the projects you will be tackling, there are some common hand tools that you’ll find yourself reaching for over and over and again.
In this segment, we’ll help you figure out where to start in assembling you first DIY toolkit. We’ll give you the “must-haves… that you’ll need to take your skills to the next level. So let’s get started.
The best place to start is by selecting the right toolbox where you store your new tools. Here I have a great starter toolbox made of hard plastic that will withstand years of use and abuse. As you can see it has two latches and two flip-up organizer compartments on top for storage of things like screws and other hardware. When you openthe lid, there is a convenient pull-out tray with three dividers that will help keep your tools separated in different compartments. With the tray removed, you can see there is a lot of room underneath to store all of your tools.
So what are we going to put in our new toolbox? Let’s start with pliers. I recommend three pair of pliers, including a pair of slip joint pliers, a pair of needle nose pliers and a pair of medium sized channel locking pliers. Having these three will cover most applications when you need to grab and hold onto either large or small items.
Next, screwdrivers. If I had to choose a good starter set, I would suggest one slotted and one Phillips. These both have a nice grip that fits your hand well and are large enough for heavy duty tasks.
You’re certainly going to need a wrench, and this medium-sized adjustable wrench will do just fine. It also has a bright colored handle that will make it easy to find when we need it.
The next tool we’ll keep in our top tray is this 10… bullet level. Remember, a level is a precision instrument that deserves extra care. You’ll want to keep in the top tray so it doesn’t get banged around down below.
To round out the top tray is this retractable blade knife, which is a handy tool to have for a variety of cutting applications.
In the bottom, we’ll put larger items, starting with our bright orange 25-foot tape measure, which is easy to spot and has a large, thick blade with big numbers.
Also in our toolbox we have this 16-oz. hammer with a soft, cushioned grip. While you wouldn’t frame a house with this, it will work well for most tasks around the house.
If we need to cut sheet metal or snip a wire, these snips will come in very handy. Just be sure to keep them locked in place when not in use to avoid dulling the blades or cutting yourself when you reach for them.
For starter sets, we love combo tools that can perform more than one task. The blade of this chisel can also be used as a wood rasp, and the edge of the blade is a file, making it a useful tool for multiple projects.
Eventually we’ll want a variety of scrapers and putty knives, but to start with, this 3… stiff blade putty knife will be very useful for a variety of painting and scraping tasks.
For cutting metal or anything other than wood, we’ll need a hacksaw.
For cutting wood and drywall, this compact keyhole saw will fit nicely in the bottom of our toolbox and can make some basic cuts until we can build up our collection of power tools.
And last but not least, a pair of safety glasses which you should wear whenever you are working with the other tools in your toolbox.
Now your basic starter toolbox is complete. Oh, I almost forgot. No toolbox would be complete without the ultimate tool … duct tape.
There you have it. A good basic toolkit with quality tools that will get you started down the road to many home improvement projects. Now let’s go find something to fix.
Close Transcript
Thanks for sharing.I found a lot of interesting information here. https://notepad.software/ A really good post, very thankful and hopeful that you will write many more posts like this one.
Many people sit at books and synopses and teach for hours, but I’m not the one who uses this site that helps me in any written work, quickly and efficiently for everyone who wants to get good grades.
Really I appreciate the effort you made to share the knowledge. The topic here I found was really effective to the topic which I was researching for a long time.
I should express that I like this article so a ton and moreover using it in regular. I believe you would continue sharing better than average articles here.
Literature term paper is also an enlarged activity like Literature research paper and is written with proper organization and structure ( https://oliviasmith.micro.blog/importance-of-a/ ). For a Literature term paper, there should be a full table of contents, a title page, a references page and a well-justified argument with proper headings and informative details.
Really I appreciate the effort you made to share the knowledge. The topic here I found was really effective to the topic which I was researching for a long time.
Thank You For Sharing this Amazing Detailed Steps. I Loved It.
I Think if anyone Follows Your Guidelines They Will Made a Day. You have listed an amazing techniques Thanks.
I haven’t made my own DIY toolkit yet because I don’t how to do it step by step.
It was a pleasure reading your essay. The information you provide is both fascinating and humorous. mapquest directions
Enjoy diy fun.
Thank you for providing such useful information. I’ve been having trouble coming up with many questions about this topic. I’ll stick with you!