


Boutique Burlap Pillows Without the Boutique Prices
Posted by: Summer Baltzer

Boutique burlap pillows are in high demand and are demanding high prices. Some of this is due to the custom nature of the pillows, but much of it is due to the overall popularity of interesting home pieces that come with a nostalgic feel. Although the idea of a vintage tea or coffee bag from a distant land sounds romantic, it also sounds expensive. So, if you like the idea of a little instant gratification, try making your own in just a few simple steps.
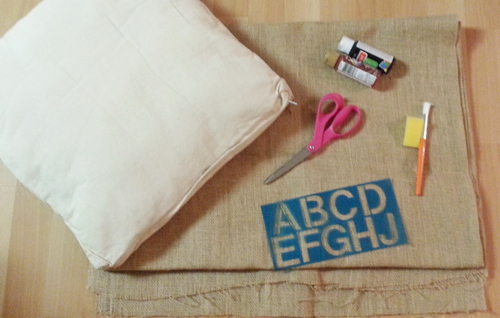
Here is what you’re going to need:
- 1 to 2 yards of burlap
- Sewing thread
- Needle or sewing machine
- Acrylic paint
- Stencil or a steady hand
- Paint applicator
- Pillow insert
1. Measure out your pillow size
The nice thing about making your own pillows is that you’re not limited to any specific size. You can go as large or small as you want. The average square pillow size used for a couch is around 18×18 or 20×20. If you’re interested in some floor cushions, try 24×24.
Cut out the shape of your pillow, making sure that you have two pieces for a front and back that are the same size. I prefer doubling up on the burlap so the pillow feels a little more solid, but if you’re looking to save a little money, one layer will be fine. Also, with this project, you don’t have to worry about which side needs to face out for applying your design. Burlap is the same on both sides, so there is no need to stress about getting it right.
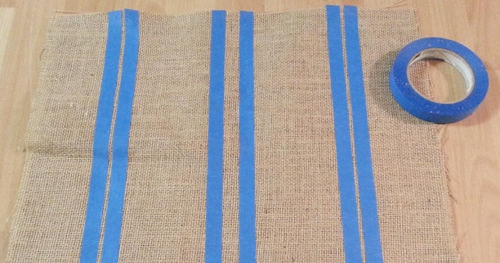
2. Create your stencil
Before sewing your pillow, together you’ll want to apply your design with your fabric lying flat. To do that, you need to know what your design is! Check out the Internet for some classic motifs you can use to create your own, or use a store-bought stencil. Consider personalizing your pillows with a family crest or personal message. When creating a more complicated stencil, I like to design it on the computer, then print it out on card stock. Once the design is in place, cut select pieces of the image out to create the motif to be transferred to the pillow. Or, if you’d like to go the simple route, painter’s tape will do a great job in a pinch!
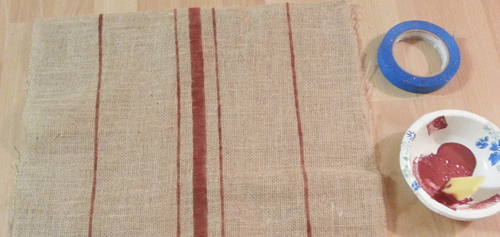
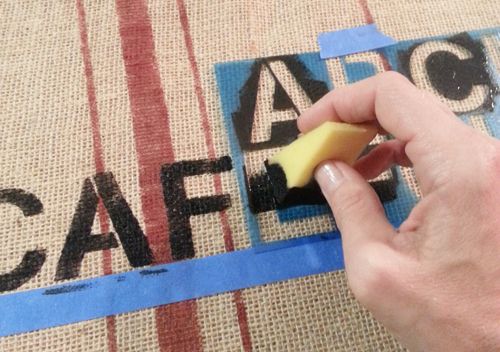
3. Applying your stencil
Once you have decided on your design and have your stencil materials sorted, it’s time to apply the color! On a flat surface, lay out the areas you’re looking to cover. Using your acrylic paint and your applicator, begin to apply the color. I prefer using a sponge or even a paper towel for this type of project. For a more vintage look, worry less about applying heavy color. It’s okay for some of your design to have a worn away look. To do that, make sure you brush off a little paint before you take it to your material. Build up the color. Also, don’t worry about applying the stencil straight or centered. The sacks that many of the boutique pillows are made from are flawed in some way, so embrace this idea and be casual about it. If you feel like you have a heavy hand with paint, apply your color evenly, then lightly sand away some of the color using a fine grit paper or sponge once it’s dried.
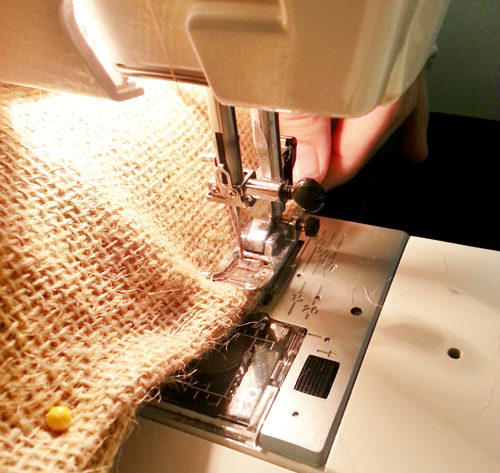
4. Sewing it together
Once your design has been applied and is dry, it’s time to sew your pillow together. Make sure your design is not facing out, but to the inside of your pillow cover. Sew up the top and two sides of your pillow cover first. Once that is done, turn your pillow cover right side out. The last steps are to insert your pillow form, fold in your seams, and sew up the bottom. Quick Tip: Burlap is thick, so go slowly and use pins to keep your seams together. It will make the process much easier!

Make a collection of pillows, then toss them about for fun and unique accessories!


I am not the only one who get information through this online tutorial.This is the best ever way to know synchronization setting.Follow this http://syncsettingswindows10.com and enjoy the step by step guidance.
Thank you so much for your help, I am learning a lot at least. I for one have learned a lot from this.
I’ve recently delved into the fascinating world of stock images, thanks to a fantastic website I discovered. This platform chadwick boseman offers a wide range of high-resolution photos, and the best part is they’re all royalty-free. It’s an invaluable resource for bloggers, marketers, and designers alike.