


Tearing Out Old Kitchen Flooring
Posted by: Liz Lichtenberger
After my husband, David, and I painted our kitchen walls (and then painted them again) and painted our kitchen cabinets and got a new counter-top and sink installed, the next step was a new floor.
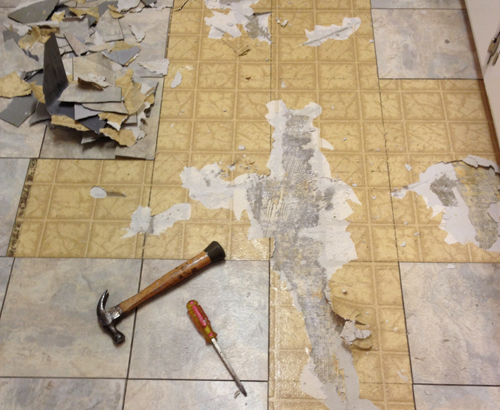
Here’s what the old floor looked like:

There were actually two floors there: the linoleum that was original to the condo, and, on top of it, the peel-and-stick vinyl tiles we believe the previous owners quickly added shortly before putting the home on the market. You can see where the vinyl is shifting, causing the old linoleum to peek through.
It looked pretty bad before, but now, with upgrades all around the rest of the kitchen, the next step was to replace the floor. We knew we wanted to tile it with ceramic or porcelain tile, but first, we had to remove the old floor.
It actually wasn’t too difficult to peel up the old flooring. We simply used screwdrivers to pry it up (occasionally using a hammer to get the screwdriver wedged farther under the old floor). We tried to do both layers at once, but where we couldn’t, we pulled up the tile first, and then the linoleum.
In these photos, you can see the vinyl tile, linoleum, and concrete underneath.
While it wasn’t difficult, it wasn’t a quick project, either. We spent about a month, working several hours each weekend and a couple of nights a week, removing the old flooring.

The trickiest part was removing the glue. See all that white? That’s the adhesive that peeled away from the linoleum and remained firmly glued to the floor.
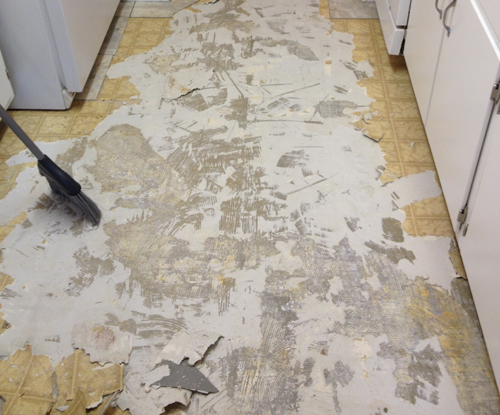
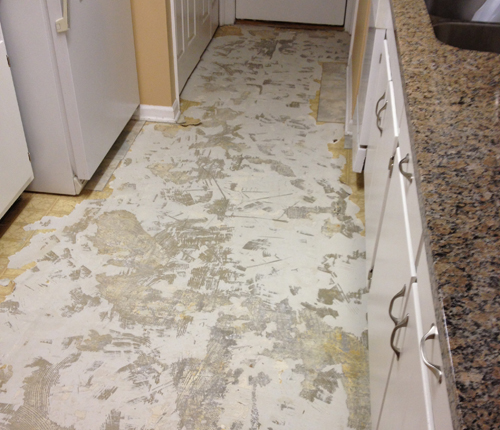
We removed it using a short-handled floor scraper. David hammered the end of the scraper to remove big chunks of glue. My job was to constantly sweep and clear away the old pieces. Again, it was slow going, and we ended up with many large garbage bags’ worth of old flooring and adhesive.
Once we’d cleared out as much as we could in a section, I went over it with a long-handled floor scraper (it’s pictured in the background of the photo below), which helped remove any pieces of glue we’d missed. Because the thinset we’d be using when we put down the tile would be thick enough to level out the small differences in the floor where some pieces of glue remained, we didn’t have to get up every last bit of glue, but we got as much as we could.

We had to take out the refrigerator and stove to remove the flooring under it. Fortunately, since these were small spaces, it only took about an hour per space to clear out the old flooring. We removed the bottom parts of the dishwasher to get up the old flooring near the front of it but chose not to remove the whole dishwasher. It was more difficult to take out, and no one would see any flooring—old or new—under it, as long as the front part was done correctly.
We also removed the baseboards and kickplates under the cabinets.
At the end of our kitchen is a small half bathroom and a laundry room. We waited and did those rooms last, simply because we just wanted to remove the washer, dryer, sink and toilet once (rather than taking them out to remove the flooring, putting them back, then removing them again when it was time to tile).
We did get a slight break in the bathroom where there used to be an old vanity (which was later replaced with a pedestal sink):

It was nice to see that bare concrete—it meant just a little less flooring to remove!
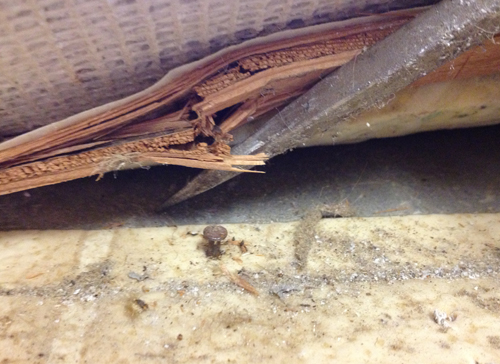
We also had to remove the transition piece between the old kitchen flooring and the carpet that leads into the dining and family rooms. Because we’re planning to replace the carpet soon, we weren’t too concerned about tearing it up at the edges. Here, you can see the carpet, the transition piece, the tack strips, and the last bit of old linoleum:
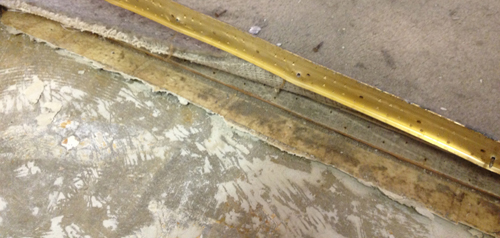
I pried up the transition piece with a screwdriver (using a hammer when necessary to hammer the screwdriver further under the transition piece), then used the same method to remove the tack strips. Finally, I was able to remove the last bit of linoleum.
Yes, the linoleum was dirty and gross after several years of being covered by vinyl stick-on tile. At least it had all been under the tile and not on top of it! Fortunately, it didn’t take long to pull the old flooring (and the transition piece and tack strips) up and then sweep to clear out all the dirt and dust.
It was easy to pull the nails up with the claw end of the hammer. And luckily for us, the concrete underneath was in great shape. It was level and didn’t have any cracks. It doesn’t look like much here, but it’s ready for tile!

We’d already picked out the tile at our local store: a brownish-beige ceramic tile. We knew we wanted something that would go with the other beiges and neutrals in our kitchen, but we wanted a tile that was a little darker to contrast with our white kitchen cabinets.

After we finished removing the floor, we headed back to the store to get enough tile to cover the area, which is a little less than 150 square feet, and quarter-inch spacers to go between the tiles. (The size of spacers you want is personal preference, but we heard that most people did ¼-inch or 3/8-inch.)
Soon I’ll have a post about the tile-laying process, so stay tuned!


Thank you for sharing your experience.It really is helpful.
It seems like tedious process you guys went through. When I tiled in my rental house kitchen (about 375 sq. ft. with 2 layers of vinyl) did buy heater from Harbor Freight http://www.harborfreight.com/1600-watt-heavy-duty-dual-temperature-heat-gun-10001100-69342.html and respirator (Home Depot)+ putty knife http://www.harborfreight.com/4-piece-stainless-steel-putty-knife-set-94325.html and tapping knife http://www.harborfreight.com/quickview/index/index/id/1570/
My wife and I put on respirator so any fumes from glue don’t harm us. I hooked up heating gun to an extension cable and stated heating vinyl. Once vinyl starts getting hot, I started scraping with tapping knife and my wife was holding edge of vinyl. It came out in big chunks and I was finished in 3-4 hours. After that I scraped glue with big scraper. It is more convenient using heat vs. just elbow grease.
If somebody else is removing vinyl, use this method for fast work.
God Bless. Thank you.
[Save money whenever you can; not in-lieu of your precious Health]
That old vinyl contains asbestos. You should NOT remove this yourself.
It MAY contain asbestos. They SHOULD have gotten it tested before removing themselves, but it does not automatically mean that its containing.
Hey Liz! Did it take you a month to remove the flooring because you were taking your time or because it realistically takes a month to remove it? My husband and I are about to start removing our linoleum and would love to know!
Welp, that didn’t go as planned! Looks like we have a lot more work to do. https://www.house4baby.com/blog/2018/1/23/bye-bye-vinyl-flooring
Keeping your flooring pristine, or glue-free, can take a lot of diligence. Speaking of which, for those thinking of branching into wood flooring projects, consider what Rustic Lumber Co. has to offer. https://www.rusticlumberco.com/our-products
Thanks for your advice, it’s helpful as always! In fact, it is important to find a good contractor so that he can recommend the best material for you and do a quality job. I collaborated with the site https://www.simpleflooring.com/ and it was an amazing experience